Adventures in Goldwork

This 4 week online course led by Hanny Newton at Ardington School of Crafts was the most enjoyable thing that I did during lockdown. It was the first time I had encountered the venue and they looked after us so well throughout and even following the event. A lovely touch was sending participants recipes for the cakes and biscuits we would usually be welcomed with on campus. I’ve never really fancied the precision of goldwork although I enjoy using gold in my work. However, Hanny’s approach was much more experimental and her teaching style was just so encouraging it made me want to experiment a bit more. She was generous with her own ideas, inspirations and motivations and was keen to encourage participants to share their work each week. I decided to try and incorporate some techniques into my work, rather than totally develop something new. This piece, Tate St.Ives, incorporates couched gold, silver and bronze passing threads. We were encouraged to apply the techniques to other materials so there’s a bit of couched chiffon in there too. We also experimented with padding and, although not covered in gold, I have included it and couched around the edge. The patched and pieced frame works well with the gold fabric and I’m pleased with the result. I think the learning point for me is that this is an expensive hobby if you’re going to work it on a large scale but the techniques can be applied and maybe its good to work on a small scale sometimes!

Tate St.Ives
Starting out
Patching & piecing

Other things

I write this blog for myself to record what I’m doing and right now I need to focus; I’ve been dabbling in too many things. Or, perhaps I’ve just been learning new skills. Here they are! A proud moment – I followed a knitting pattern – hooray – to make this lovely coat for Gwen, our Greyhound. Maybe a bit big underneath, but you need to get her legs in somehow and its easily adjusted by fixing to the inside of the rib instead of the outside. Excuse the peg tin balancing on her head!

Then I’ve been weaving diamonds with Alice @humelooms. This was an online workshop and completed with Alice telling us when to go under and over – Not sure I’d be able to do it again!

Then I decided that I would use some of the money I had placed with West Dean College for a course that didn’t happen last year and signed up to a Small Twined Baskets Zoom day with Mary Crabb. It was a really nice day making 2 “big toe” sized baskets out of paper string, using basketry techniques. Something nice to do with your hands. I like the little round bottomed basket.

Last year I purchased some Indian woodblocks from the Arty Crafty Place. They work with artisans in India to commission the blocks and then show you what you can do with them in a series of videos. Well worth visiting the website to take a look. I decided that I was going to make some gifts for friends but hadn’t got much beyond stamping a few cards, until now. I made this t-towel for a friend – she is probably wondering what’s wrong with me – I didn’t tell her it was hand printed!

I also attended a 4 week workshop, Adventures in Goldwork with Hanny Newton at Ardington College but I’ll save that for another day!

Little Birdy

On a windy, rough, Sunday a few weeks ago, I crossed the sea to Portsmouth to participate in a very enjoyable workshop run by The Makers’ Table at their Hotwalls Studio. I knew I was going to make a bird and I could see from the illustration that fabric was involved, but I hadn’t really thought much beyond that. When I sat at the table with the 3 other participants, I was surprised to see goggles, wire, pliers and hammers! Oh well, I thought, lets go with the flow.

Plied with tea and homemade Victoria sandwich cake, I manipulated my wire into an armature resembling a rather plump bird, the result of not quite having enough strength to pull the wire tight! Stage 2 was to rummage through the fabrics to find small pieces to stitch over each ‘space’ within the armature. Simple overstitch soon had us filling in the spaces of our birds. Then came the stuffing and the birds came to life.

The next stage, once he was all sewn up, was to embellish him with eyes and wings. I chose vintage button eyes. The wings, we made out of tomato puree tubes. We were encouraged to rub down the printed side with some sandpaper, but running out of time, I decided simply to etch a few marks into them and stitch them on. They look fine!

Finally, we chose our plinths. Most people chose some driftwood, but mine looked perfect on a gift box. Its so lovely to see how everyone’s turned out. You may still be able to see the bird that advertised this workshop on the website.

I’ve got a couple of driftwood plinths lurking around the house and I’ve just purchased some iron wire (great for crafters) so watch this space, I may try a few more! Meanwhile, see how he flies around the garden!


Red, black and white weave

Red, black and white weave
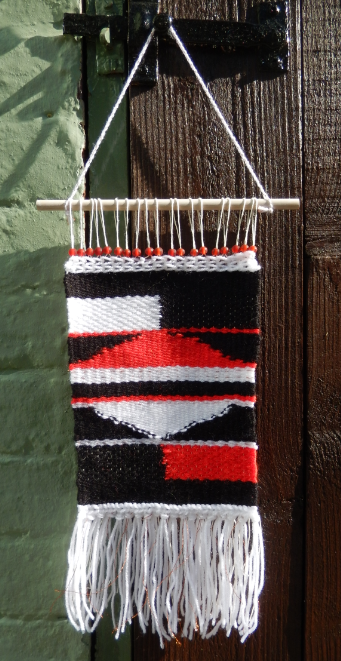
You know that feeling when you’ve learnt something new but you go back to it a month or two later and it feels like you’ve forgotten everything? Well, Alice Hume had the wonderful idea of a establishing a weaving club to keep her students coming back for more. I thought I had better start something before turning up, so I muddled through the sumac, not quite the way Alice had taught me, but it sufficed. The first club night reminded me about joining two colours together and I ambitiously embarked on a curved shape. Carrying on at home, I attempted to mirror that curve and Alice told me I had invented a new weave. Isn’t she kind?! Then she told me that curves were perhaps one of the most tricky things to accomplish.  Nothing like getting in at the deep end!

The second club night, I saved for re-learning the sumac to end the piece and then tying on the tassles. I was pleased with the result, which incorporated a few copper-thread highlights. I stitched a few other lines of copper through the white bits of the weave too. They are quite subtle, but glint nicely in the sun.

I added some beads to the top for decoration. A handmade cord, made with a small cordwinder (a very useful gadget) incorporates white and copper thread. A piece of dowl, painted with antique white finishes it off nicely.

Introductory Weaving Workshop

An enjoyable Saturday was spent with Alice Hume at her wonderful Hotwalls Studio in Portsmouth. If you follow my blog, you’ll know that I’ve dabbled with weaving, even exhibited some with TRAC’s Line of Flight and the latest Ryde Sands weaves. But there is no substitute for learning a technique properly with an expert. Alice patiently guided us through the whole process of threading the handloom, weaving the sumac and weaving the pattern. I learnt how to integrate 2 and even 3 colours along the line and how to tie tassels properly.

Alice incorporates copper into her tapestry weaving and uses recycled denim too – I have plenty of that I could experiment with! I also admire her floor loom work – it isn’t just a piece of fabric, it has texture and echoes her tapestry weaving style. People travel from all over the South to Alice’s workshops and I can see why. You can even buy a workshop gift voucher for a friend. I think I will try her Macrame workshop next.

Here’s what I accomplished in a day:

Hume Looms

Textile Tales

Stitch Story
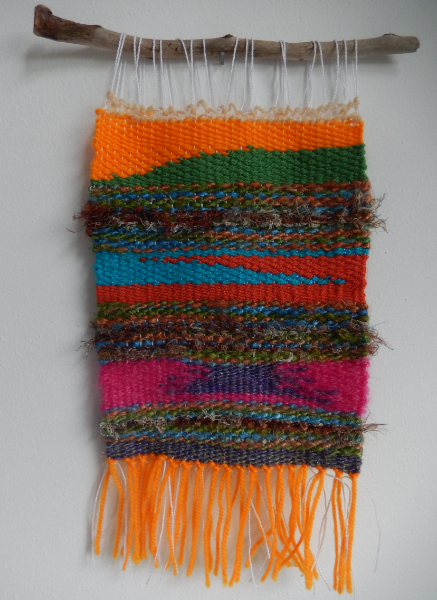
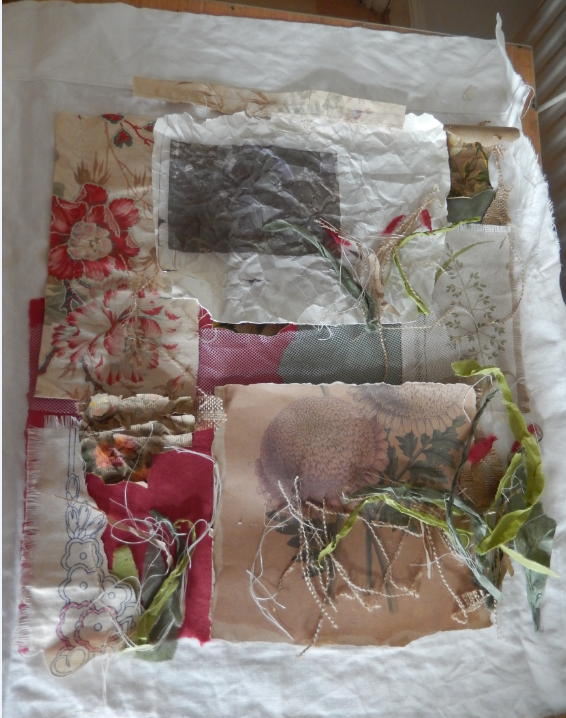
I enjoyed the most inspirational day I’ve had in ages yesterday. Local artist Rebecca Robinson ran her first workshop, Textile Tales, in her new studio at the Depozitory in Ryde. I knew I would be challenged because she had marketed it around the idea of memories and stitch; I live very much in the present and find the idea of memories difficult. I also don’t really work with photographs or vintage materials. However, by the end of the 4 hours I was hooked. I had learnt several new ways of reproducing images that could be incorporated into my work and had really loosened up the creative urge. So much so that, as you can see, I’m blogging again! The image you can see, left, is the unrolling of the work this morning. I’ve pieced things together ready to stitch.

Yesterday evening was spent perusing Cas Holmes’ Stitch Stories and The Found Object I wanted to know more about this technique. The dog had an extra special walk through the fields today as I gathered a few plant samples for monoprinting. I feel the need to incorporate something more of my own into the composition. What fun – here is a selection of the 20 or so monoprints I made this morning. Image 1, left, is the result of the plate, an old OHP sheet, inked up with the plant laid on top. A piece of paper was laid over both and rubbed firmly. Image 2, the plant is peeled off the plate and placed on the fabric. A clean OHP sheet was laid on top and was rubbed over firmly and the plant was peeled off. Image 3, is the result of a piece of cloth laid over the plate after the plant has been peeled off. 3 very different prints from one hard working plant.

Diversifying

Over the summer, I enjoyed 4 days of a sewing bee, led by Hannah Woodford here on the Isle of Wight; me another lady and some school girls, a diverse group which Hannah accommodated beautifully! The first day was spent tearing up magazines to create a book of ideas for our designs. I knew before I started that I wanted to make a skirt, but I was delighted to be encouraged to incorporate my stitching skills into the design. Appliqué and inlay appliqué gave my skirt a unique character and with Hannah’s help the skirt fits beautifully. Not bad for a first attempt! I also won the sewing bee and was presented with a beautiful heart pin-cushion, much to the annoyance of the school girls I think. They’d spent the time transforming old denim jackets and skirts into really up-market pieces.

20160925-083741.jpg20160925-083722.jpg

Yesterday, I decided I was going to test what I had learnt and attempt another. I found a great YouTube video on how to make a pattern for an a-line skirt. It’s all cut out and ready to go. Next step is to purchase the special hidden zipper foot for my sewing machine. I found a good video about how to sew an invisible zipper too. Watch this space perhaps to see another skirt or maybe some more how to videos!


Proddy Rag Rug

I’ve been looking for a rag rug workshop for some time and finally found one at The Spring in Havant. Led by Penelope Davis, we had a gentle introduction to the technique of proddy rag rugging. I came away with a dauntingly large piece of rug canvas with just a small, central circle of tufted rags. Will I ever finish it? Well, I’ve decided to take inspiration from Terry Frost for TRAC’s September exhibition and I am aiming to work the rug with that in mind. I’ve also promised Izi at the People’s Gallery in Ryde, that I will run a proddy rug workshop there on September 24th. I’m looking forward to it – a new venture, and it will make me finish this rug!

Capture Rug

Seed Pods

real seed podI recently enjoyed a day of felt making at Ventnor Botanic Gardens.  The day was led by Gillian Chapman who was as inspiring as ever.  She brought along her collection of real seed pods and felt creations to help us consider our projects.  I decided to work on two small seed pods which were felted around a small circular template in the same way as you would make a small bowl.  The red pod opening was made by cutting a circle in order to remove the template.  Scrunching and pulling it resulted in the final pod.  There is a nice little ‘nipple’ for want of a better word on the bottom too!  The opening of the orange pod was the result of a happy accident.  I had incorporated bubble wrap circles in the hope of creating cut-away layers, however, I hadn’t thought Seed podsthrough the placing very well and the bubble wrap ended up being just where I wanted to cut.  I think the result is really good, even though it wasn’t as I expected!  At the end of the day, some friends and I enjoyed the tranquillity of the gardens while taking photographs of more seed pods for another day.